How to Install Propane Water Heater
Cold water in a cabin shower is one of the fastest ways to find out whether your setup is truly ready. If you are researching how to install propane water heater systems, the good news is that the process is straightforward in concept. The hard part is getting every detail right - location, gas supply, venting, water connections, and startup checks all matter if you want dependable hot water and safe operation.
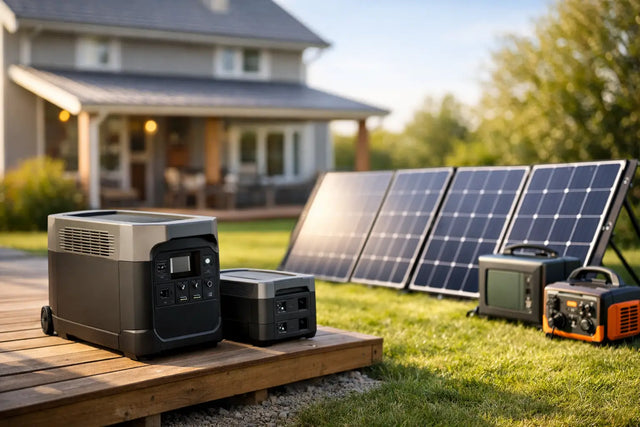
For many off-grid homes, cabins, shops, and backup living setups, propane water heaters make practical sense. They heat water quickly, do not rely on a large electric load, and keep working in places where grid power is limited or unreliable. But installation is not a casual afternoon project if you are unfamiliar with gas appliances. Some parts are within reach for a capable DIYer, while others may be better handled by a licensed plumber or gas technician, depending on local code and your comfort level.
Before you install a propane water heater
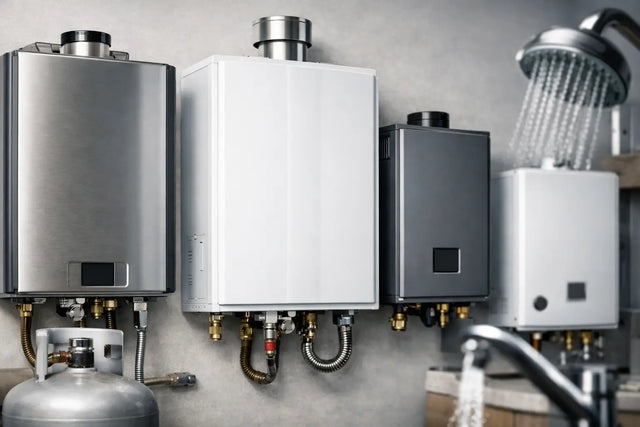
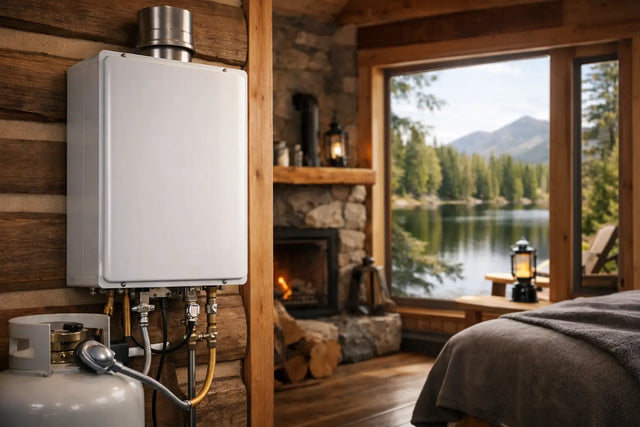
The first decision is what type of unit you are installing. A tank-style propane water heater stores heated water and is often simpler for households with steady daily demand. A tankless unit saves space and can be a strong fit for cabins, smaller homes, RV-adjacent structures, and properties where efficient fuel use matters. The installation basics overlap, but venting, gas demand, and flow-rate requirements can differ quite a bit.
Start by reading the manufacturer manual from front to back. That sounds obvious, but propane appliances are not forgiving when people rely on guesswork. Clearance requirements, vent pipe material, gas pressure, and water line sizing vary by model. What works for one heater can be wrong for another.
You also need to confirm local building and fuel-gas code requirements. In many areas, a permit and inspection are required. That is not red tape for the sake of red tape. It helps ensure your venting, combustion air, shutoffs, and gas piping are installed correctly.
Pick the right location
Where you place the unit affects both performance and safety. The heater should sit on a stable, level surface with proper clearances from walls and combustible materials. You also want a location that protects the unit from freezing conditions, physical damage, and standing water.
For tank-style models, the install area needs room for service access and drainage. For tankless units, you need to think carefully about vent routing and whether the model is approved for indoor or outdoor installation. Not every propane water heater can be mounted in every environment.
If the heater is installed indoors, combustion air and venting become critical. If it is installed in a utility room, shed, garage, or cabin mechanical area, the manufacturer may specify minimum room volume or dedicated combustion air openings. A tight off-grid structure can create drafting problems if you ignore this part.
Tools and materials you will likely need
The exact setup depends on the heater type, but most installations involve a pipe wrench, adjustable wrenches, tubing cutters or pipe tools, approved gas shutoff valves, water shutoff valves, pipe fittings, a pressure relief discharge pipe, leak-detection solution, and vent materials approved for the model. You may also need pipe thread sealant rated for gas service, flexible water connectors, unions, sediment trap components, and mounting hardware.
This is one of those jobs where using the right material matters more than saving a few dollars. Vent pipe, connectors, and gas fittings need to match the appliance listing and fuel type. Close enough is not good enough.
How to install propane water heater step by step
1. Shut off utilities and prepare the area
Before removing an old unit or placing a new one, shut off the water supply and turn off the propane supply at the tank or appliance shutoff. If you are replacing an existing heater, disconnect it carefully and drain the old tank fully before moving it.
Clean the install area and confirm the floor or wall can support the unit. For tankless models, mount the bracket and unit exactly as directed. For tank models, set the heater in place and check that service panels, controls, and valves remain accessible.
2. Connect the water lines
Attach the cold-water inlet and hot-water outlet using approved fittings. Many installers add shutoff valves on both sides to simplify future maintenance. On tank-style units, dielectric fittings may be required if you are joining different metals.
Do not overtighten fittings. That is a common mistake and can crack threads or distort connectors. If your system has hard water, installing a sediment filter or flush setup can help protect long-term performance, especially on tankless units with narrow heat exchanger passages.
A temperature and pressure relief valve is mandatory on tank-style heaters, and the discharge pipe must run to an approved termination point. That discharge line is a safety device, not an optional accessory.
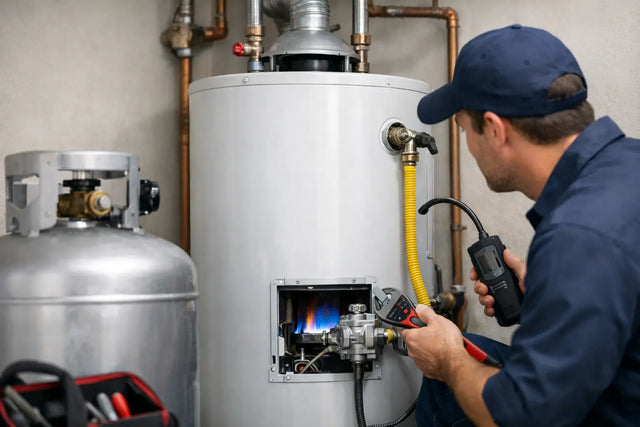
3. Install the propane gas connection
This is the point where many homeowners decide to bring in a licensed pro, and that is often a smart call. The gas line must be sized for the heater's BTU demand and for the total demand of all propane appliances on the system. Undersized gas piping can cause poor burner performance, ignition failure, or unsafe operation.
Install an approved gas shutoff valve near the appliance, and if required by code and manufacturer instructions, add a sediment trap to catch debris and moisture before it reaches the gas valve. Use only approved fittings and sealant rated for propane.
Once connected, pressure-test and leak-test the line. Use a proper leak-detection solution on every joint. Never check for leaks with a flame. If bubbles form, shut the gas off and fix the connection before doing anything else.
4. Install venting correctly
Venting is where installation quality really separates safe systems from risky ones. A propane water heater produces combustion gases that must be exhausted exactly as required by the manufacturer. The vent material, diameter, rise, length, and termination clearance all matter.
Tank-style atmospheric units usually rely on vertical venting and proper draft. Direct-vent and power-vent models have different requirements. Tankless models often use sealed vent systems that are brand- and model-specific. Mixing vent components that are not approved for the unit can create serious hazards.
Pay close attention to termination location outdoors. The exhaust outlet must be positioned away from windows, doors, air intakes, and other openings as required by code. In cold climates, think about snow buildup and wind exposure too. A vent termination blocked by snow can shut your system down right when you need it most.
5. Fill the unit and purge air from the water lines
Before firing the heater, open the cold-water supply and fill the system completely. Open one or more hot-water faucets to purge trapped air from the lines. On a tank-style heater, the tank must be completely full before the burner is turned on. Firing an empty tank can damage the unit.
Check every water connection for leaks while the system is pressurized. A dry paper towel is useful here because it shows even a small drip quickly.
6. Start the heater and test operation
With the water side full and leak-free, restore propane supply and follow the manufacturer startup sequence. That may involve lighting a pilot on some models or simply energizing the ignition system on others.
Set the thermostat or output temperature to a safe level. Around 120 degrees Fahrenheit is common for household use, though your exact setting depends on household needs and scald protection concerns. Higher is not always better. It increases burn risk and can waste fuel.
Let the unit cycle and verify that it ignites properly, vents correctly, and delivers steady hot water. Listen for unusual noises, look for error codes, and recheck gas and water connections once the system reaches operating temperature.
Common installation mistakes to avoid
The most common problems are avoidable. People undersize the gas line, ignore venting rules, skip leak testing, mount units in poor locations, or assume all propane water heaters install the same way. They do not.
Another frequent mistake is choosing a heater based only on price or size without matching it to actual use. A small tankless unit may be perfect for one sink and one shower in a cabin, but frustrating in a larger home with simultaneous demand. A larger tank model may provide more predictable performance, but it takes up more space and stores standby heat. The right answer depends on how you live, not just the product spec sheet.
When to call a professional
If you are comfortable with plumbing but not gas work, split the job. Handle the mounting and water connections yourself if allowed, then hire a licensed professional for gas hookup, venting review, and startup. That approach often saves time and reduces risk.
You should also bring in a pro if your install involves new propane piping from the tank, vent penetrations through a roof or exterior wall, code questions, or a larger whole-home tankless unit with high BTU demand. Off-grid systems reward self-reliance, but they also reward knowing where precision matters most.
A better install means better reliability
A propane water heater is not just another appliance. For many households, it is part of a readiness plan that supports daily comfort, remote living, and backup resilience when utility service is limited. That is why careful installation matters. Reliable hot water starts long before the first shower - it starts with proper sizing, safe connections, correct venting, and a final system check you can trust.
If you want your setup to work when the grid is down, the weather turns bad, or the cabin fills up for the weekend, take the install seriously. Do it right, and your water heater becomes one more dependable part of a self-reliant system.